Become rustic: MLOps without Fancy Stacks and with Zero Cost
When you came into MLOps, what you found on the internet are fancy stuff such as Sagemaker, S3, Google AutoML, AzureML, and others. But you don't need to get FOMO and jump into them in the beginning, since MLOps is not a platform. This way is much cheaper because it is free.
Note that this advice is for entrance-level, and you might need more complexity as your business scaled up.
Okay, enough talking, let's start!
1. Beginning
What you need are:
- Google Colab
- Google Drive
- Pyngrok
- MLFlow
And a bit of creativity. We will create a simple machine learning model for linear regression.
2. Set Up Environment and Train ML Model
- To set up your environment, the first step is to create a folder in your google drive. The folder is the place to save our MLOps artifacts such as models, metrics, and parameter logs.
- The next step is to start a new Jupyter Notebook inside a folder. In the jupyter notebook, you need to link the folder in the drive. You also need to install MLFlow and PyNgrok.
!pip install mlflow --quiet
!pip install pyngrok --quietfrom google.colab import drive
drive.mount('/content/drive')%cd /content/drive/MyDrive/mlflow/linear
3. After the set up completed, you can put the core ML code. Before starting the training, we need to open the MLFlow UI so that we can track the experiments. We will use port 80 for the service.
import os
import warnings
import sys
import pandas as pd
import numpy as np
from sklearn.metrics import mean_squared_error, mean_absolute_error, r2_score
from sklearn.model_selection import train_test_split
from sklearn.linear_model import ElasticNet
from urllib.parse import urlparse
import mlflow
import mlflow.sklearn
import logging
logging.basicConfig(level=logging.WARN)
logger = logging.getLogger(__name__)get_ipython().system_raw("mlflow ui --port 80 &")
To get your Ngrok token, you can log in at https://ngrok.com/ and copy your authentication token. It is a better practice to secure it in a file than to expose the token in the notebook.
from pyngrok import ngrok# Terminate open tunnels if existngrok.kill()# Get your authtoken from https://dashboard.ngrok.com/authfile1 = open('token.txt', 'r')
NGROK_AUTH_TOKEN = file1.readlines()
ngrok.set_auth_token(NGROK_AUTH_TOKEN[0])# Open an HTTPs tunnel on port 80 for http://localhost:80public_url = ngrok.connect(port="80")
print("MLflow Tracking UI:", public_url)
In my case, I stored the token in a .txt file, with contained only the token string. This part will returned the Ngrok URL to monitor your training.
And it is the evaluation metrics, which alternatively you can use the sklearn package.
def eval_metrics(actual, pred):
    rmse = np.sqrt(mean_squared_error(actual, pred))
    mae = mean_absolute_error(actual, pred)
    r2 = r2_score(actual, pred)
    return rmse, mae, r2
And the best part, the ML experiment part.
warnings.filterwarnings("ignore")
np.random.seed(40)# Read the wine-quality csv file from the URL
csv_url = ("http://archive.ics.uci.edu/ml/machine-learning-databases/wine-quality/winequality-red.csv")
try:
    data = pd.read_csv(csv_url, sep=";")
except Exception as e:
    logger.exception("Unable to download training & test CSV, check your internet connection. Error: %s", e)# Split the data into training and test sets. (0.75, 0.25) split.
train, test = train_test_split(data)# The predicted column is "quality" which is a scalar from [3, 9]
train_x = train.drop(["quality"], axis=1)
test_x = test.drop(["quality"], axis=1)
train_y = train[["quality"]]
test_y = test[["quality"]]alphas = [0.2,0.3,0.4,0.5,0.6]
l1_ratios =  [0.2,0.3,0.4,0.5,0.6]for alpha in alphas:
  for l1_ratio in l1_ratios:
    with mlflow.start_run():
        lr = ElasticNet(alpha=alpha, l1_ratio=l1_ratio,      random_state=42)
        lr.fit(train_x, train_y)predicted_qualities = lr.predict(test_x)(rmse, mae, r2) = eval_metrics(test_y, predicted_qualities)        print("Elasticnet model (alpha=%f, l1_ratio=%f):" % (alpha, l1_ratio))
        print("  RMSE: %s" % rmse)
        print("  MAE: %s" % mae)
        print("  R2: %s" % r2)        mlflow.log_param("alpha", alpha)
        mlflow.log_param("l1_ratio", l1_ratio)
        mlflow.log_metric("rmse", rmse)
        mlflow.log_metric("r2", r2)
        mlflow.log_metric("mae", mae)        tracking_url_type_store = urlparse(mlflow.get_tracking_uri()).scheme# Model registry does not work with file store
        if tracking_url_type_store != "file":
            mlflow.sklearn.log_model(lr, "model", registered_model_name="ElasticnetWineModel")
        else:
            mlflow.sklearn.log_model(lr, "model")
In this part, we also search the best hyperparameter.
4. While waiting for training, you can look at the given Ngrok URL to track the experiment.
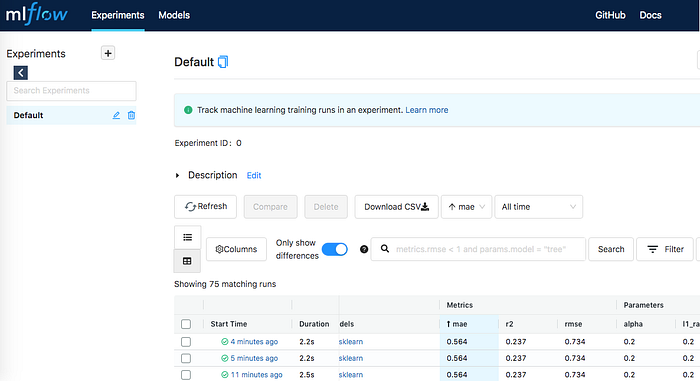
5. To see the artifact, you can go to your mlruns folder in the drive and look for the right experiment ID. The experiment ID will show at the UI if you click on one of them. In example, the best experiment is

with experiment ID 33e9f65687374b0b89c87624a8bef70f. Go for the model in google drive to run for the inference (which I also have a cheap rustic method for deployment!)
Thats all! I wish you enjoy this rustic MLOps practice.
References
https://github.com/dmatrix/google-colab/blob/master/mlflow_issue_2350.ipynb
About the Author
Salman is the Chief Data Officer at Allure AI, an emerging beauty-tech startup in Indonesia. He graduated from Astronomy and Astrophysics studies at Institut Teknologi Bandung. He is an avid reader, mountaineer, and developing interests in astronomy and computational neuroscience. Previously, he had an internship as an AI engineer in Konvergen AI, a software engineer at Chatbiz.id, and had a research assistantship in the astronomy department, as well as assisting various courses in astronomy, computational science, and management department.